I picked up this monster size monitor a year ago. It is truly ginormous and gives me plenty of screen real estate. I had it hooked up to my MacBook and everything worked perfectly fine until I upgraded macOS to Ventura and lost the Scaling option under display settings. After that, the display was all messed up, and I spent a lot of time searching on the internet what to do here. If you landed on this post through Google, I can save you some time. Also, this post will help solve washed colors in HDR mode.
Here’s what I ended up doing to get pixel perfect high DPI enabled on macOS Ventura:
- Download BetterDisplay. This utility will allow you to make this monitor work as it should with Ventura. Be ready to spend $15 for Pro version after the trial, and it is truly worth it
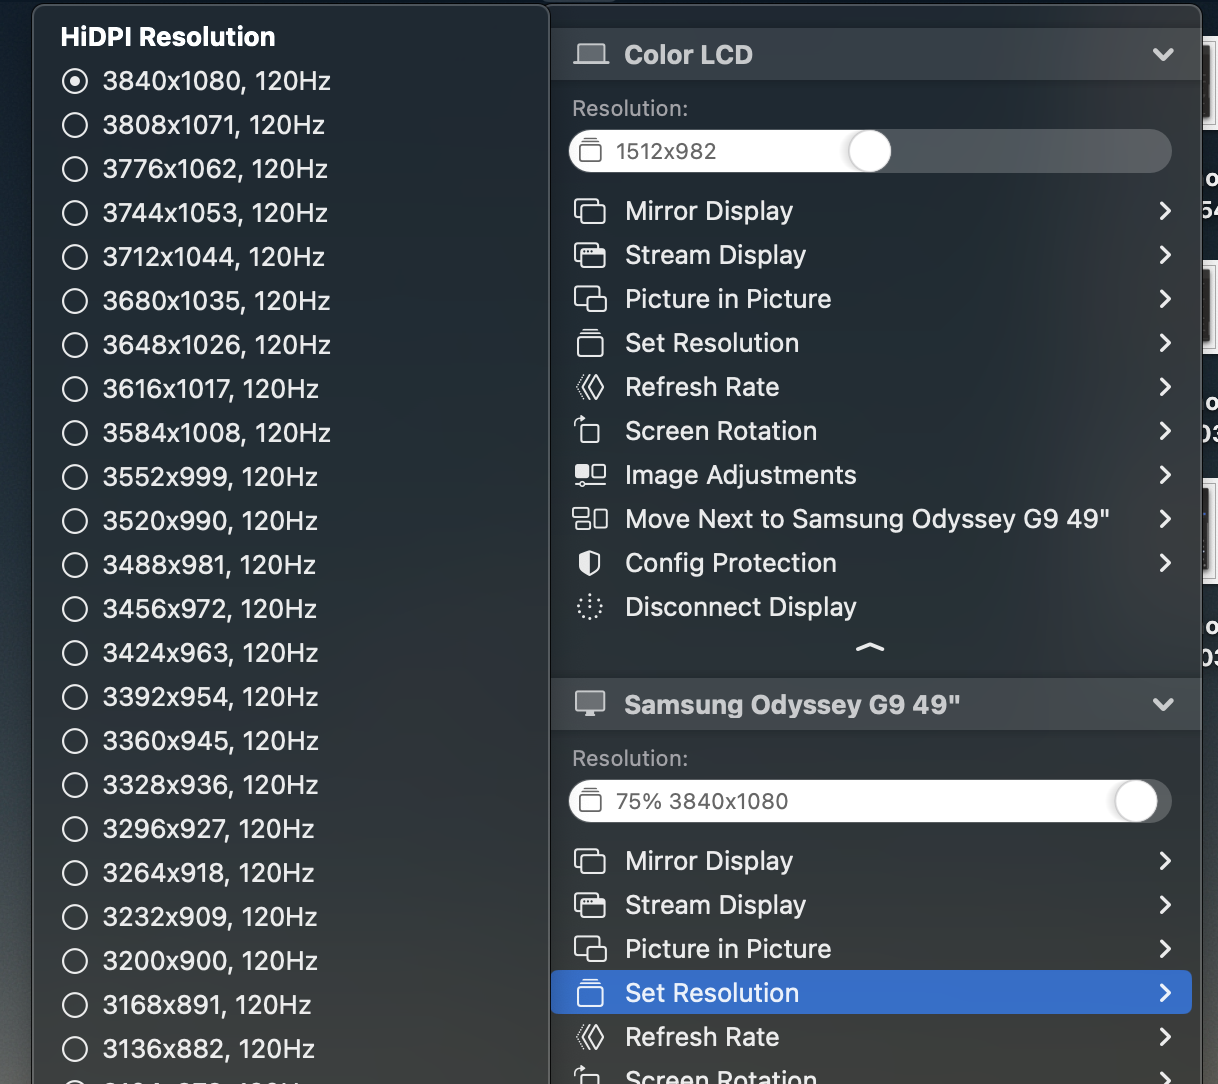
- Use the following settings under Displays tab of BetterDisplay settings
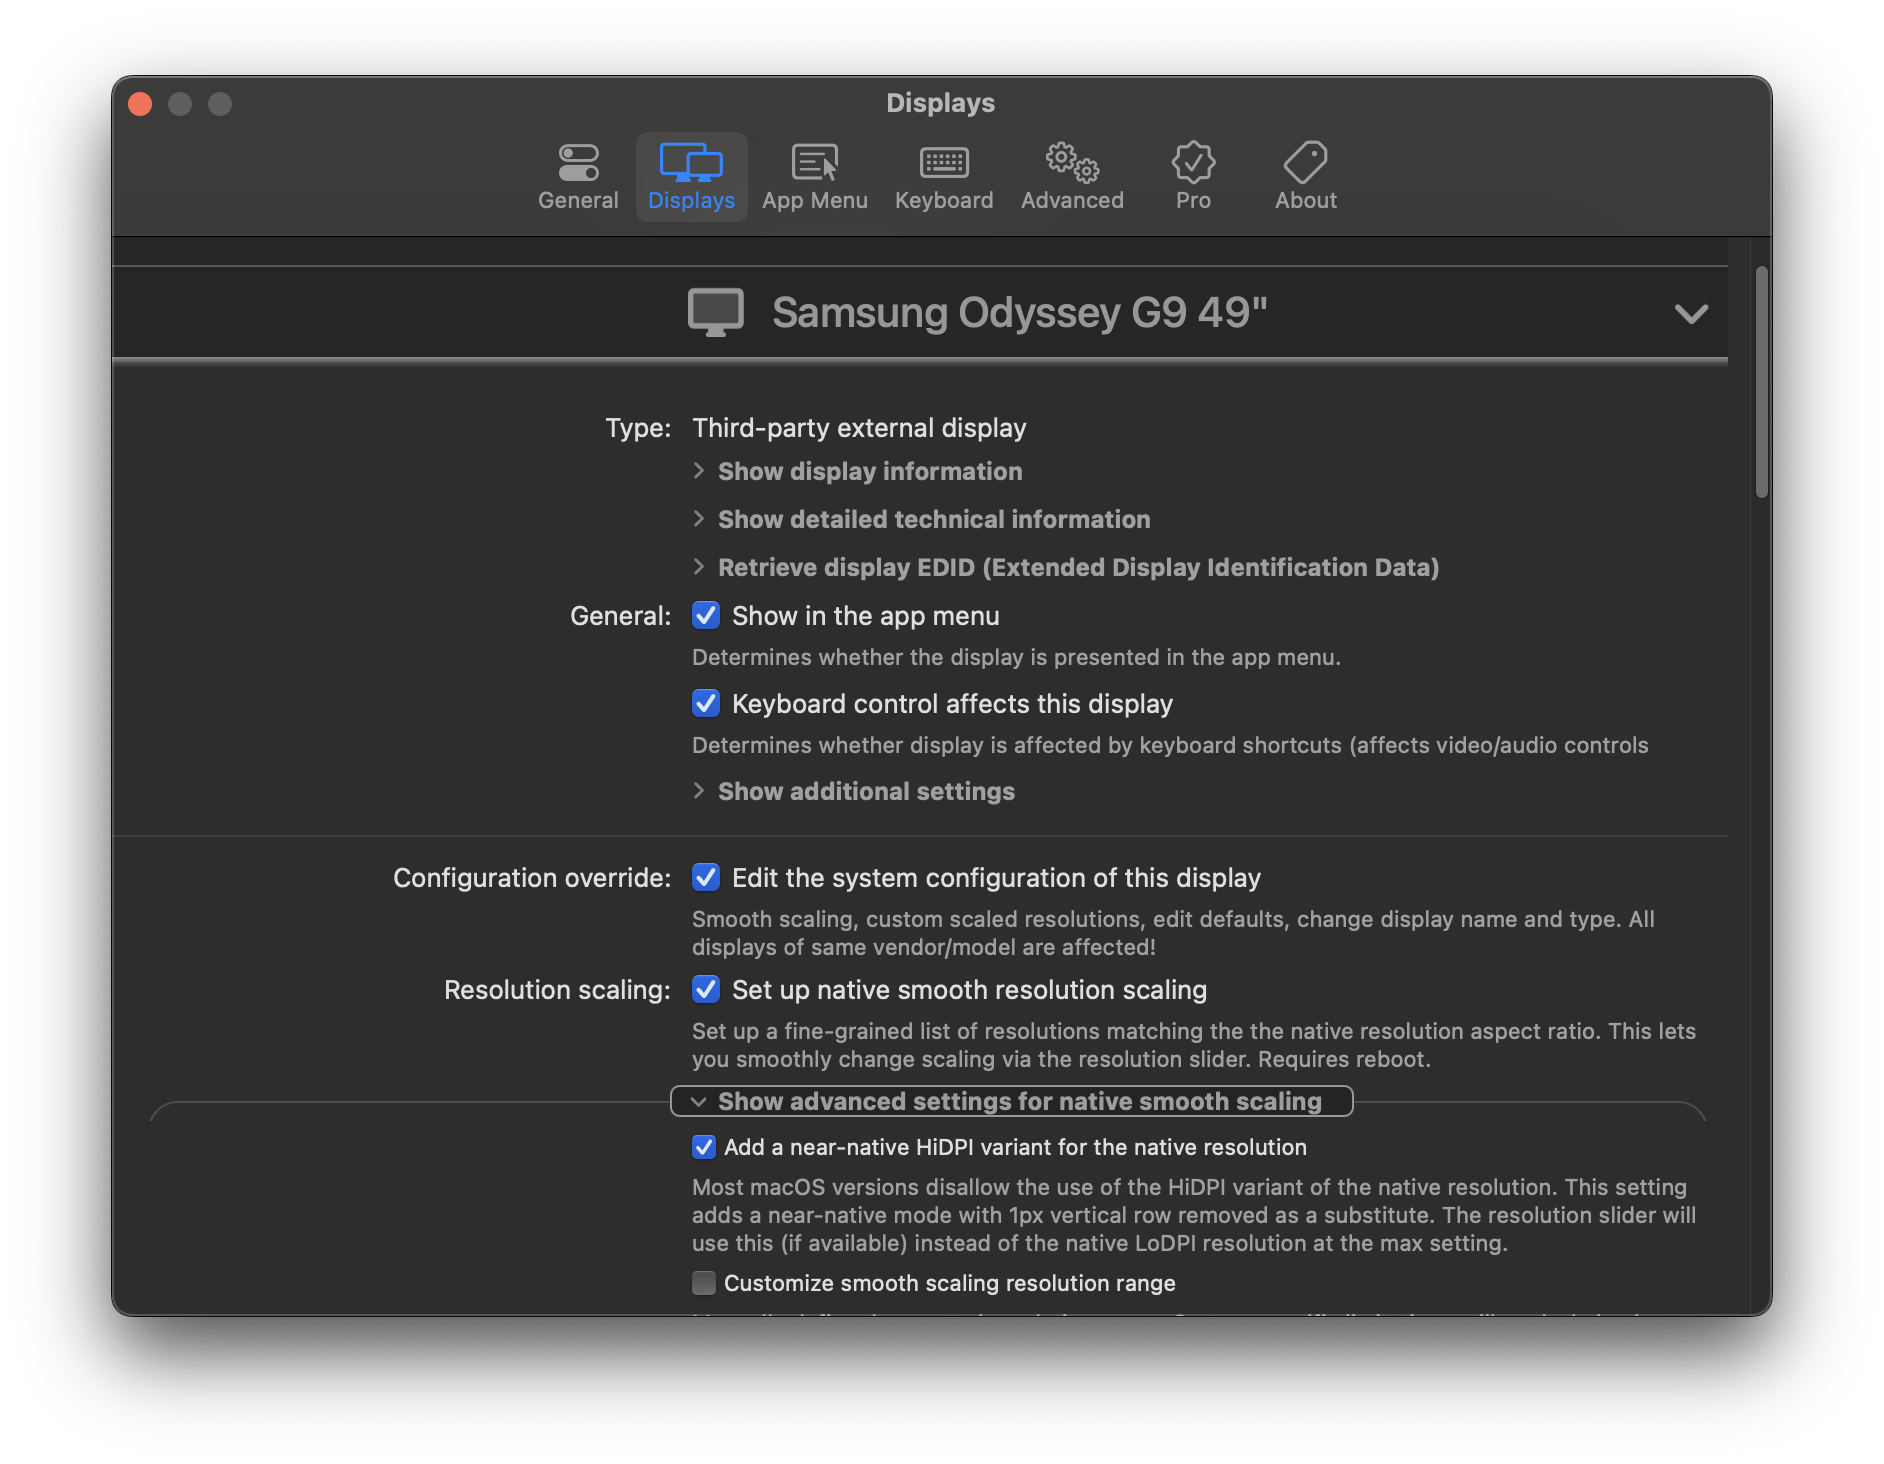
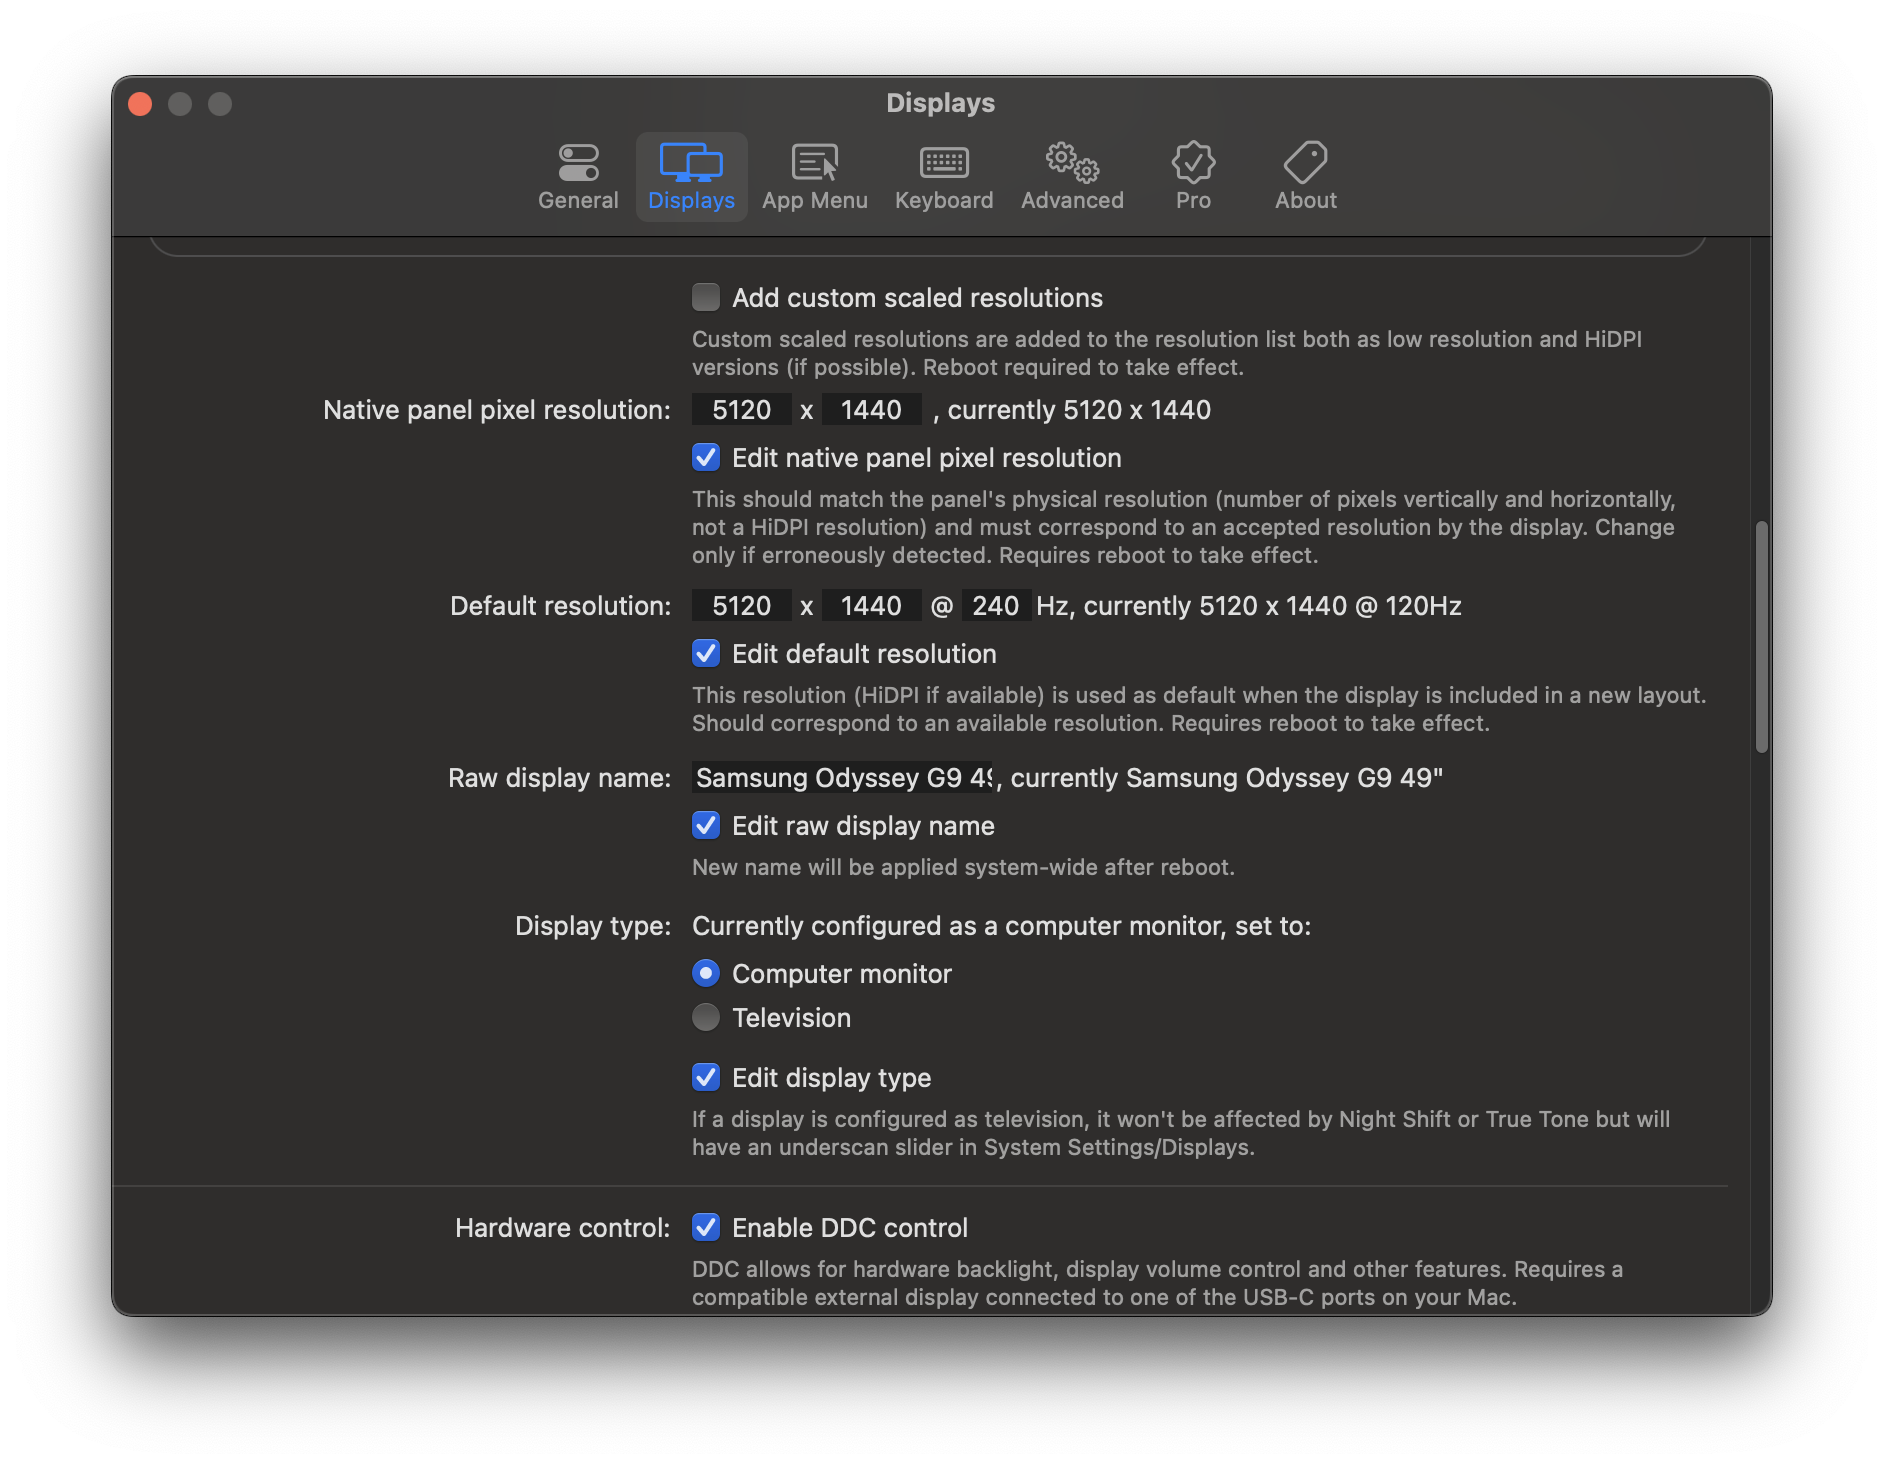
You may need to restart your computer
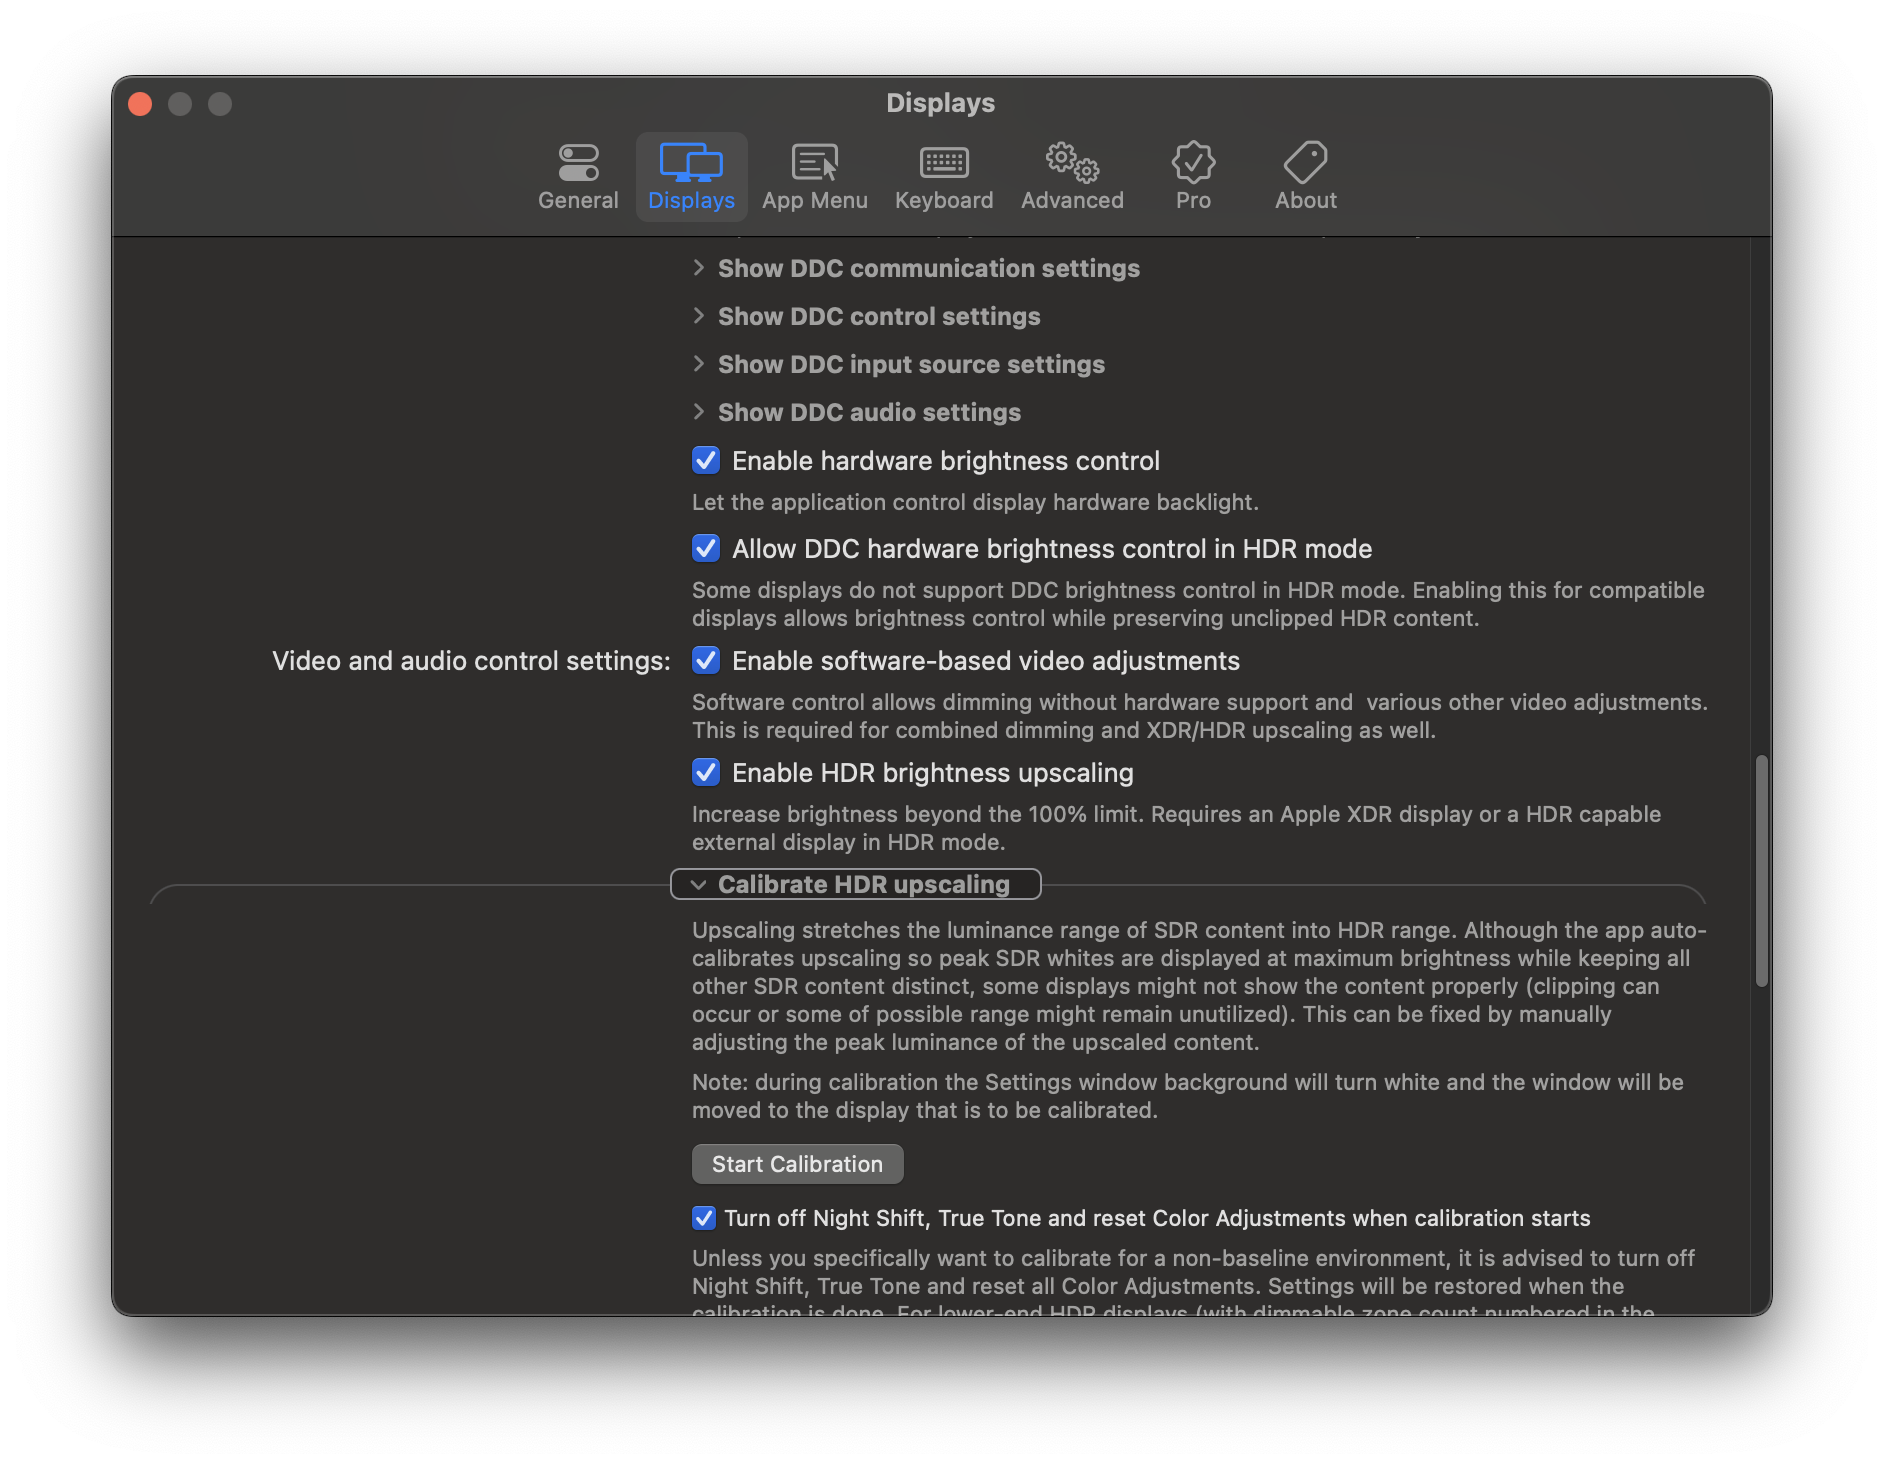
- Enable High Dynamic Range (HDR) in macOS Display Settings. Use 120 Hertz as refresh rate. As of writing of this post, there isn’t a way to get 240 Hertz working
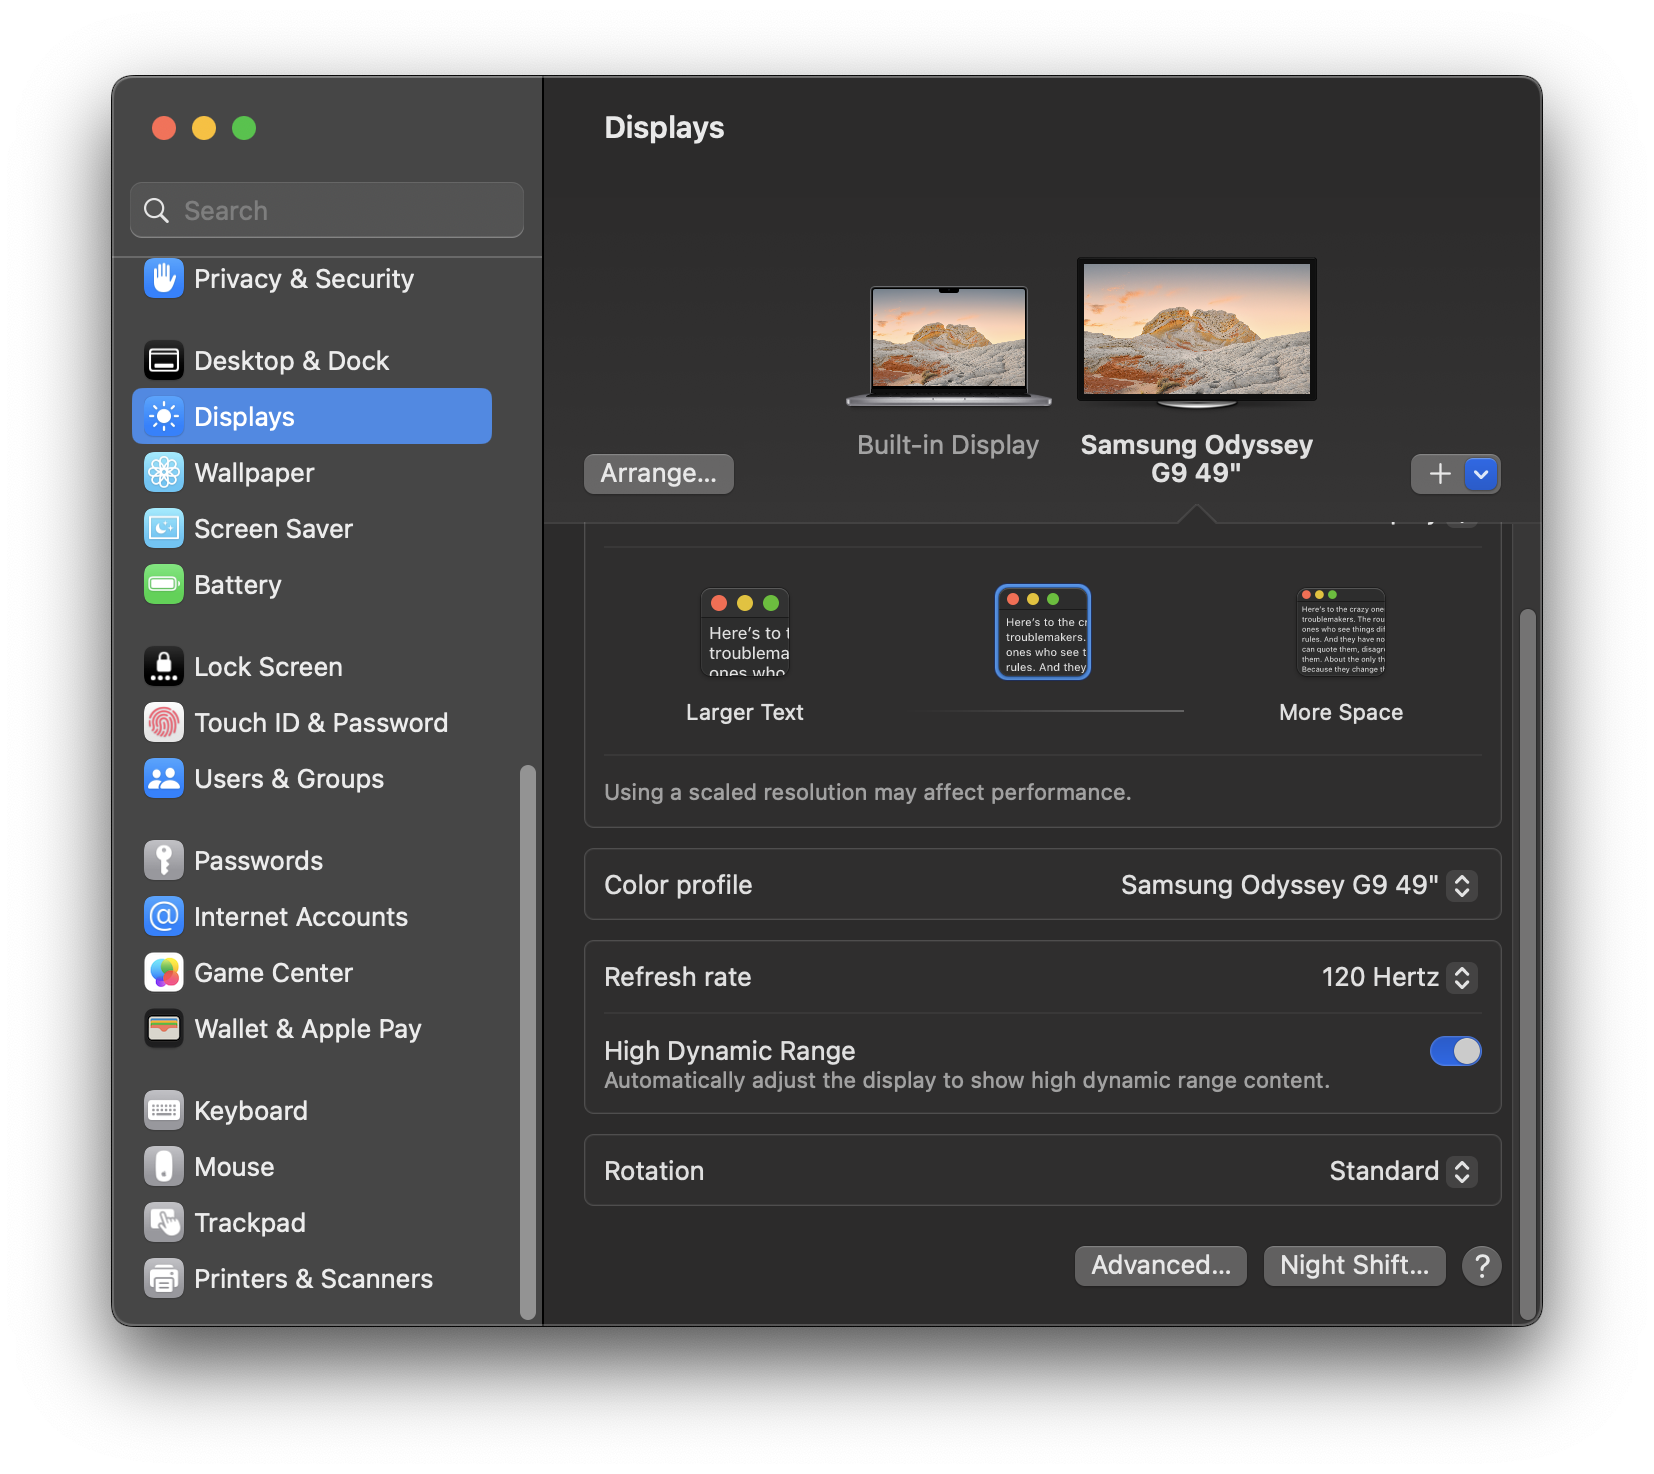
- Now in BetterDisplay, choose the highest HiDPI option, which as of writing of this post is 3840×1080. If you prefer the 5120×1440 then currently no HiDPI option for that, so choose the LoDPI setting
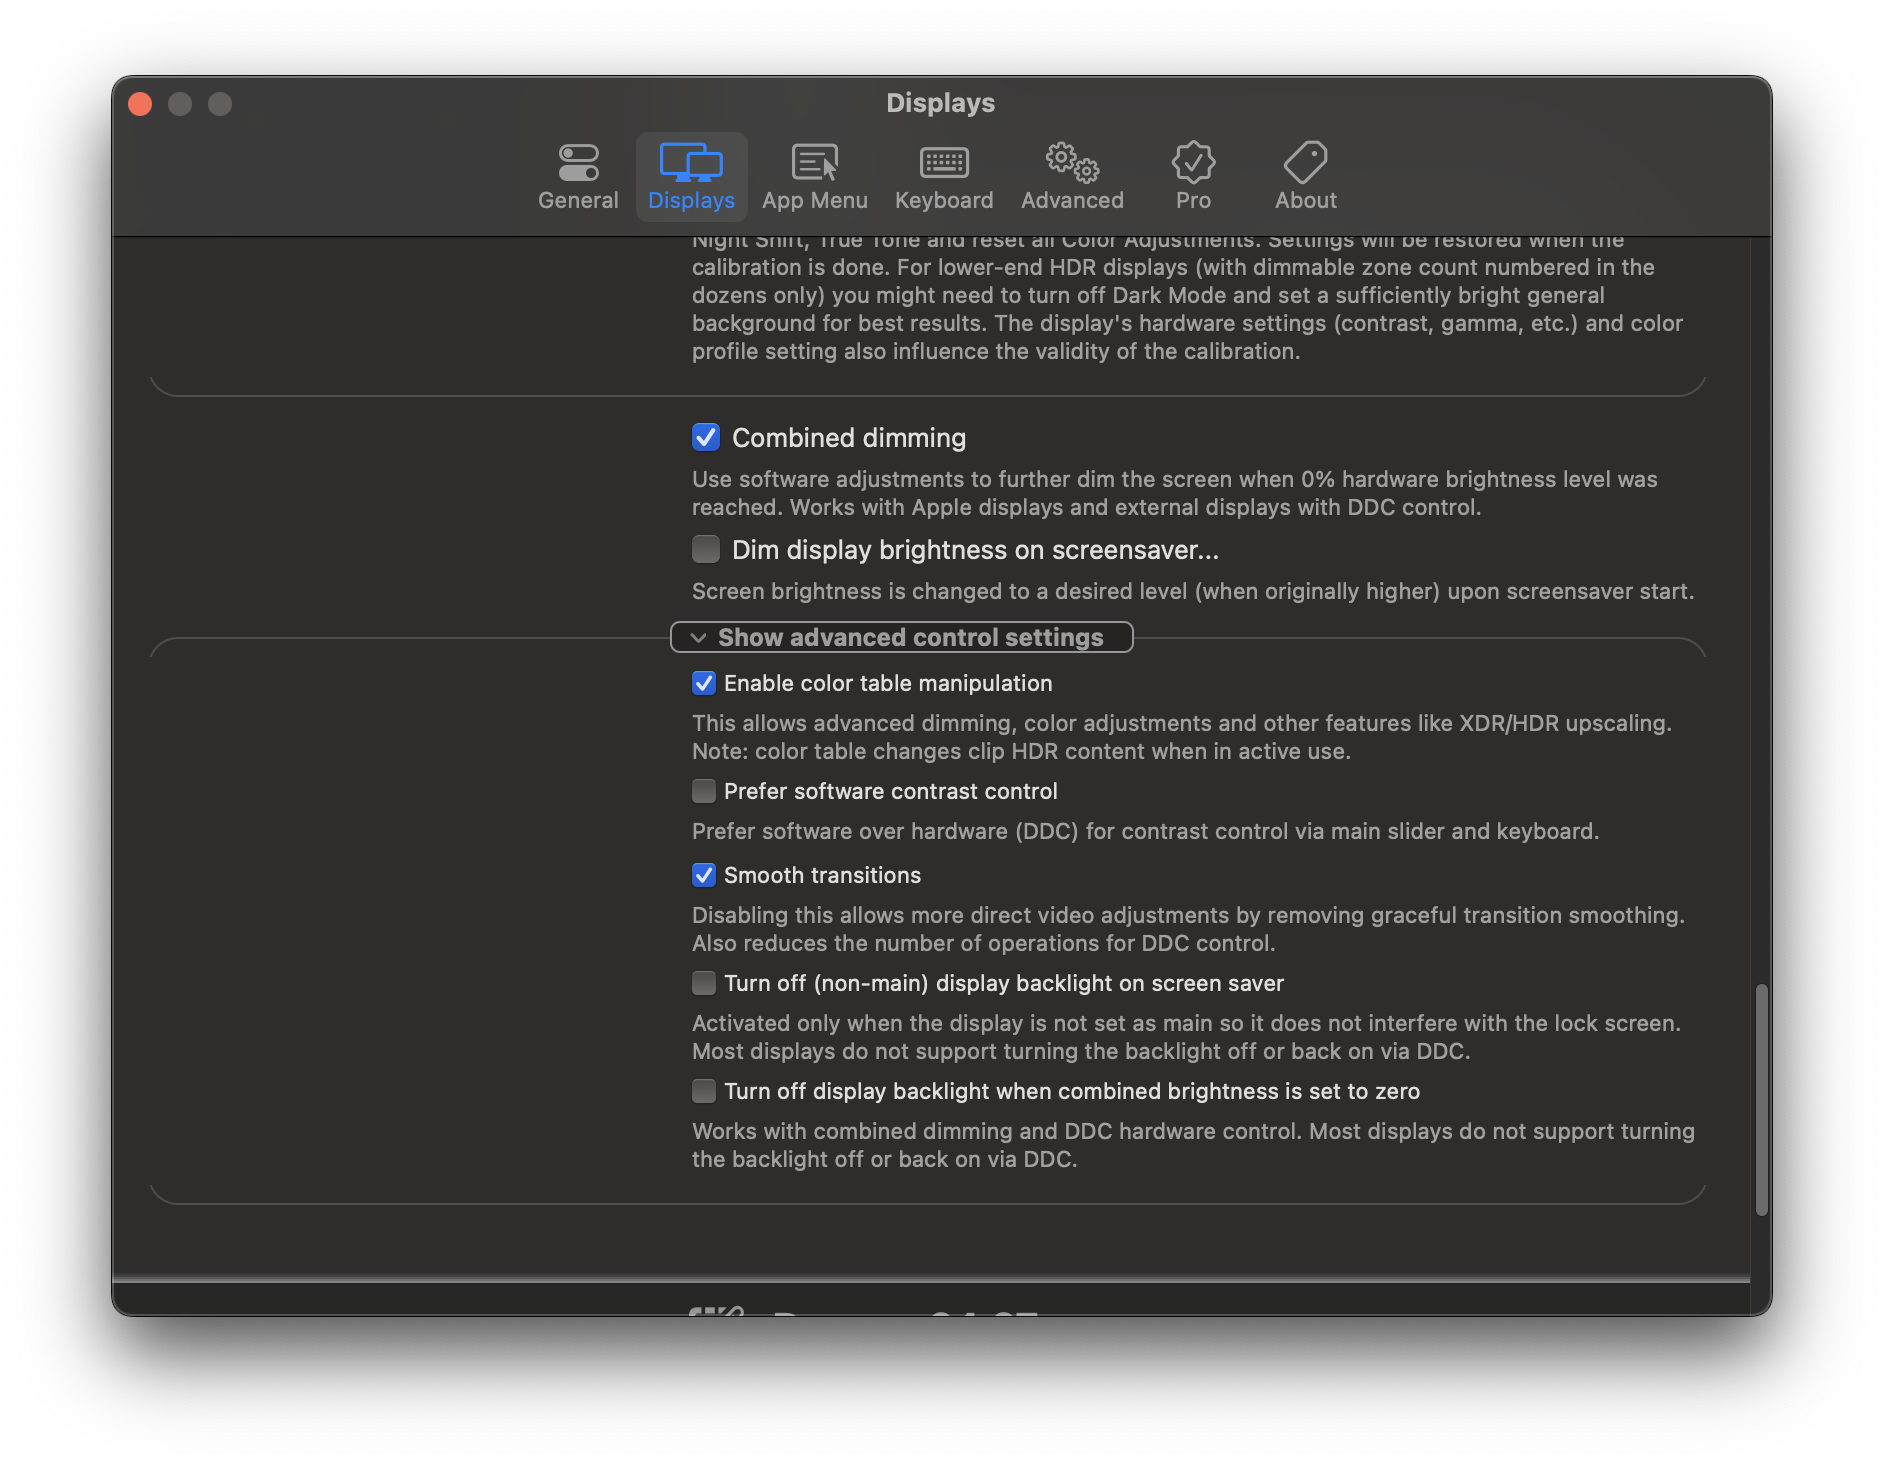
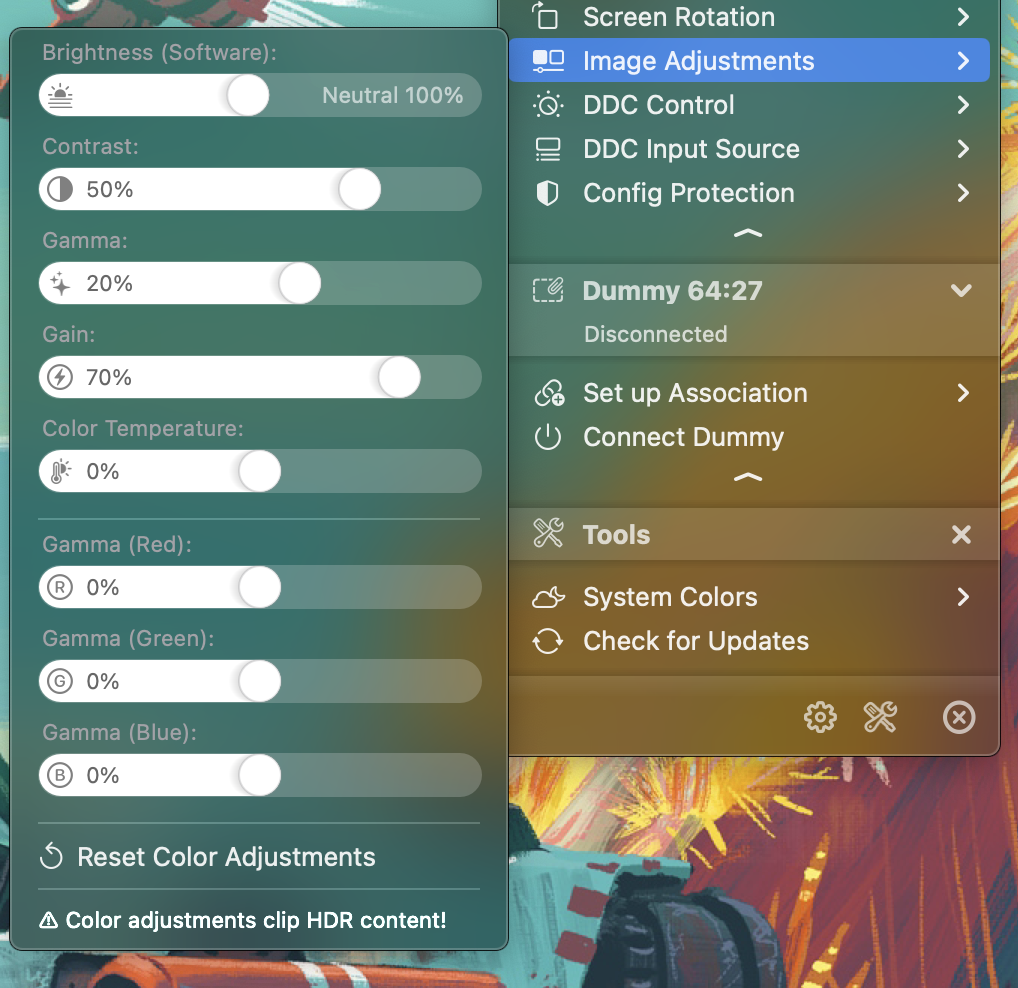
- Then finally, use the following Image Adjustments. You may need to play around to see what soothes your eyes, but these ones worked for me, and made the display looks extremely good.
That’s it! Drop a comment if this post helped you, or if you had more to say on this subject.
PS, if you want to see the monitor settings, those are below:
- Game mode
- Refresh Rate – 240
- Response Time – Fastest
- Adaptive Sync – Off
- Virtual Aim Point – Off
- Screen Size – Auto
- Picture
- Brightness – 100
- Contrast – 75
- Sharpness – 20
- Color – Normal
- System
- Local Dimming – Auto
Thank you for your guide. How do you find font sharpness at this resolution? Is it better or worse vs windows 11 scaled at 150% for example? I just bought mac mini and i use usb-c to dp1.4 but no matter scaling i choose – fonts do not seem to be as crisp as windows… And no, i cant get HiDPi using switchres somehow… I will attempt tonight. Your response is highly appreciated.. thanks!
alex
I don’t have an experience of SwitchRes so can’t speak to that. As you can read from my post, in BetterDisplay, there are clear HiDPI options available. They have a trial version you can use to see if it works. I also don’t have Windows 11 to try it out with. Lastly, 3 days after I posted it, I found a great deal for Studio Display, and ended up buying it :-D. This Samsung monitor alas is no longer in use. Studio Display is very high quality that matches MacBook’s crispness, but I miss the screen real estate of Samsung.
thanks for this! What was your impression on font quality after you applied that HiDpi resolution and now with Studio Display? I wish there would be two screenshots… 🙂
Thanks again for replying
alex
just wanted to provide an update – i tried above method on mac mini m2 plus neo g9 using better display – and could not get this resolution to appear in HiDPI option list. Not sure what to try… I am on latest Ventura
did you ever get it working?
I am sorry is your macbook has a Pro chip? I read on better display github description the following:
“The maximum horizontal pixel count is constrained on the entry-level M1 configurations to 6K (on M1 Pro/Max/Ultra to 8K) which might pose an issue to ultra-wide display users trying to go beyond a certain horizontal resolution.”
Hi,
After installed BetterDisplay and following all your steps I rebooted my laptop (MacBook Pro M1 Max) and now the screen does not come on anymore, it show the mac display for a second, than goes black with message “no signal”.
I also don’t have that 3840×1080 @120Hz show as an option.
Anyone know what to do now? The screen was working fine before BetterDisplay with all these options..
Tested with Neo G9. Still not perfect as windows or Linux but kind of ok. 5k is not looking good fonts are still blury 3840×1080 is still best option from quality perspective.
Hello Vikram. Thank you for this guide. I was racking my head as to how to bloody fix the OLED G9 misbehaving on my M3 Mac and if I had known BetterDisplay would just work, I could’ve saved so much time. I was thinking this was a cable issue (went through 6 cables), but this is squarely on Apple. I can finally have 5120×1440 show up as the default resolution which is what I want for games but resolution set to 3840×1080 which is what I have for productivity. One thing to note is that with the M3, the G95SC and Sonoma, 240Hz is supported at both the resolutions I just mentioned. Thanks again!
Which Mac M3 are you using? I’m trying with my MacBook Air M3 15” and can’t reach the 3840×1080 HiDPI resolution at all. I would love to achieve it so I don’t have to return the purchase. The best I can get is 3072×864, but it’s simply impossible to use this way; everything is absolutely huge.
At the default resolution, using BetterDisplay + USB-C to DisplayPort 8K cable, I can get the image at the maximum resolution, but only up to 120Hz. However, the text isn’t sharp.
I previously had two Samsung 4K 28” monitors directly connected to the Mac with USB-C to DisplayPort 4K cables, using 1440p scaled resolution. I’m really noticing the difference, and it’s quite annoying to have everything look blurry on the monitor all day.
Thanks Vikram! What cables/adapters are you using?
I don’t quite remember what I was using back then, and I don’t have this monitor anymore to tell you now. If I have to guess, I believe I was likely using a Thunderbolt to DisplayPort cable.
I just installed BetterDisplay and the menus don’t match up with your screen shot. Do you have or know of a newer version of this guide?
Hey should I keep Game mode turned OFF? Using this via my macbook pro for productivity. Display port to usbc. When I put my mac in sleep then wake it up the monitor fails to detect it, and if I open the lid up and close it then itll turn on but then starts to flicker endlessly on and off. Only fix is if I fully restart my computer which is annoying.
Can you post an update of you BetterDisplay config since BD has changed since. Would appreciate that!
Unfortunately, I do not have this monitor anymore, but let me see if I can find something for you
What monitor you use now, if I’m allowed to ask.
I use Apple Studio Monitor, and LG UltraFine.
I see, thanks
How is this still an issue? My monitor is the g9 at 5120×1440 240hz. Works perfect on windows, linux. But on mac, it will only do 5120×1400 at 120hz! I have an m1 max studio. The bigger issue is any program like games will only launch at 2560×1440! It’s like the mac doesn’t allow games to see the actual monitor resolution. Apples supposed to be a premium product but they can’t even support high resolution displays??
The truth is the resolution will never give you nice display on macos. Because on how the system is conceived auround 2160p resolution. 1440p is sadly in the worst spot between “good” resolution for macos. You can find videos about this on youtube.
I couldn’t find the informations at the time. Atm i am looking to sell my G9 for a 2160p screen.