Before
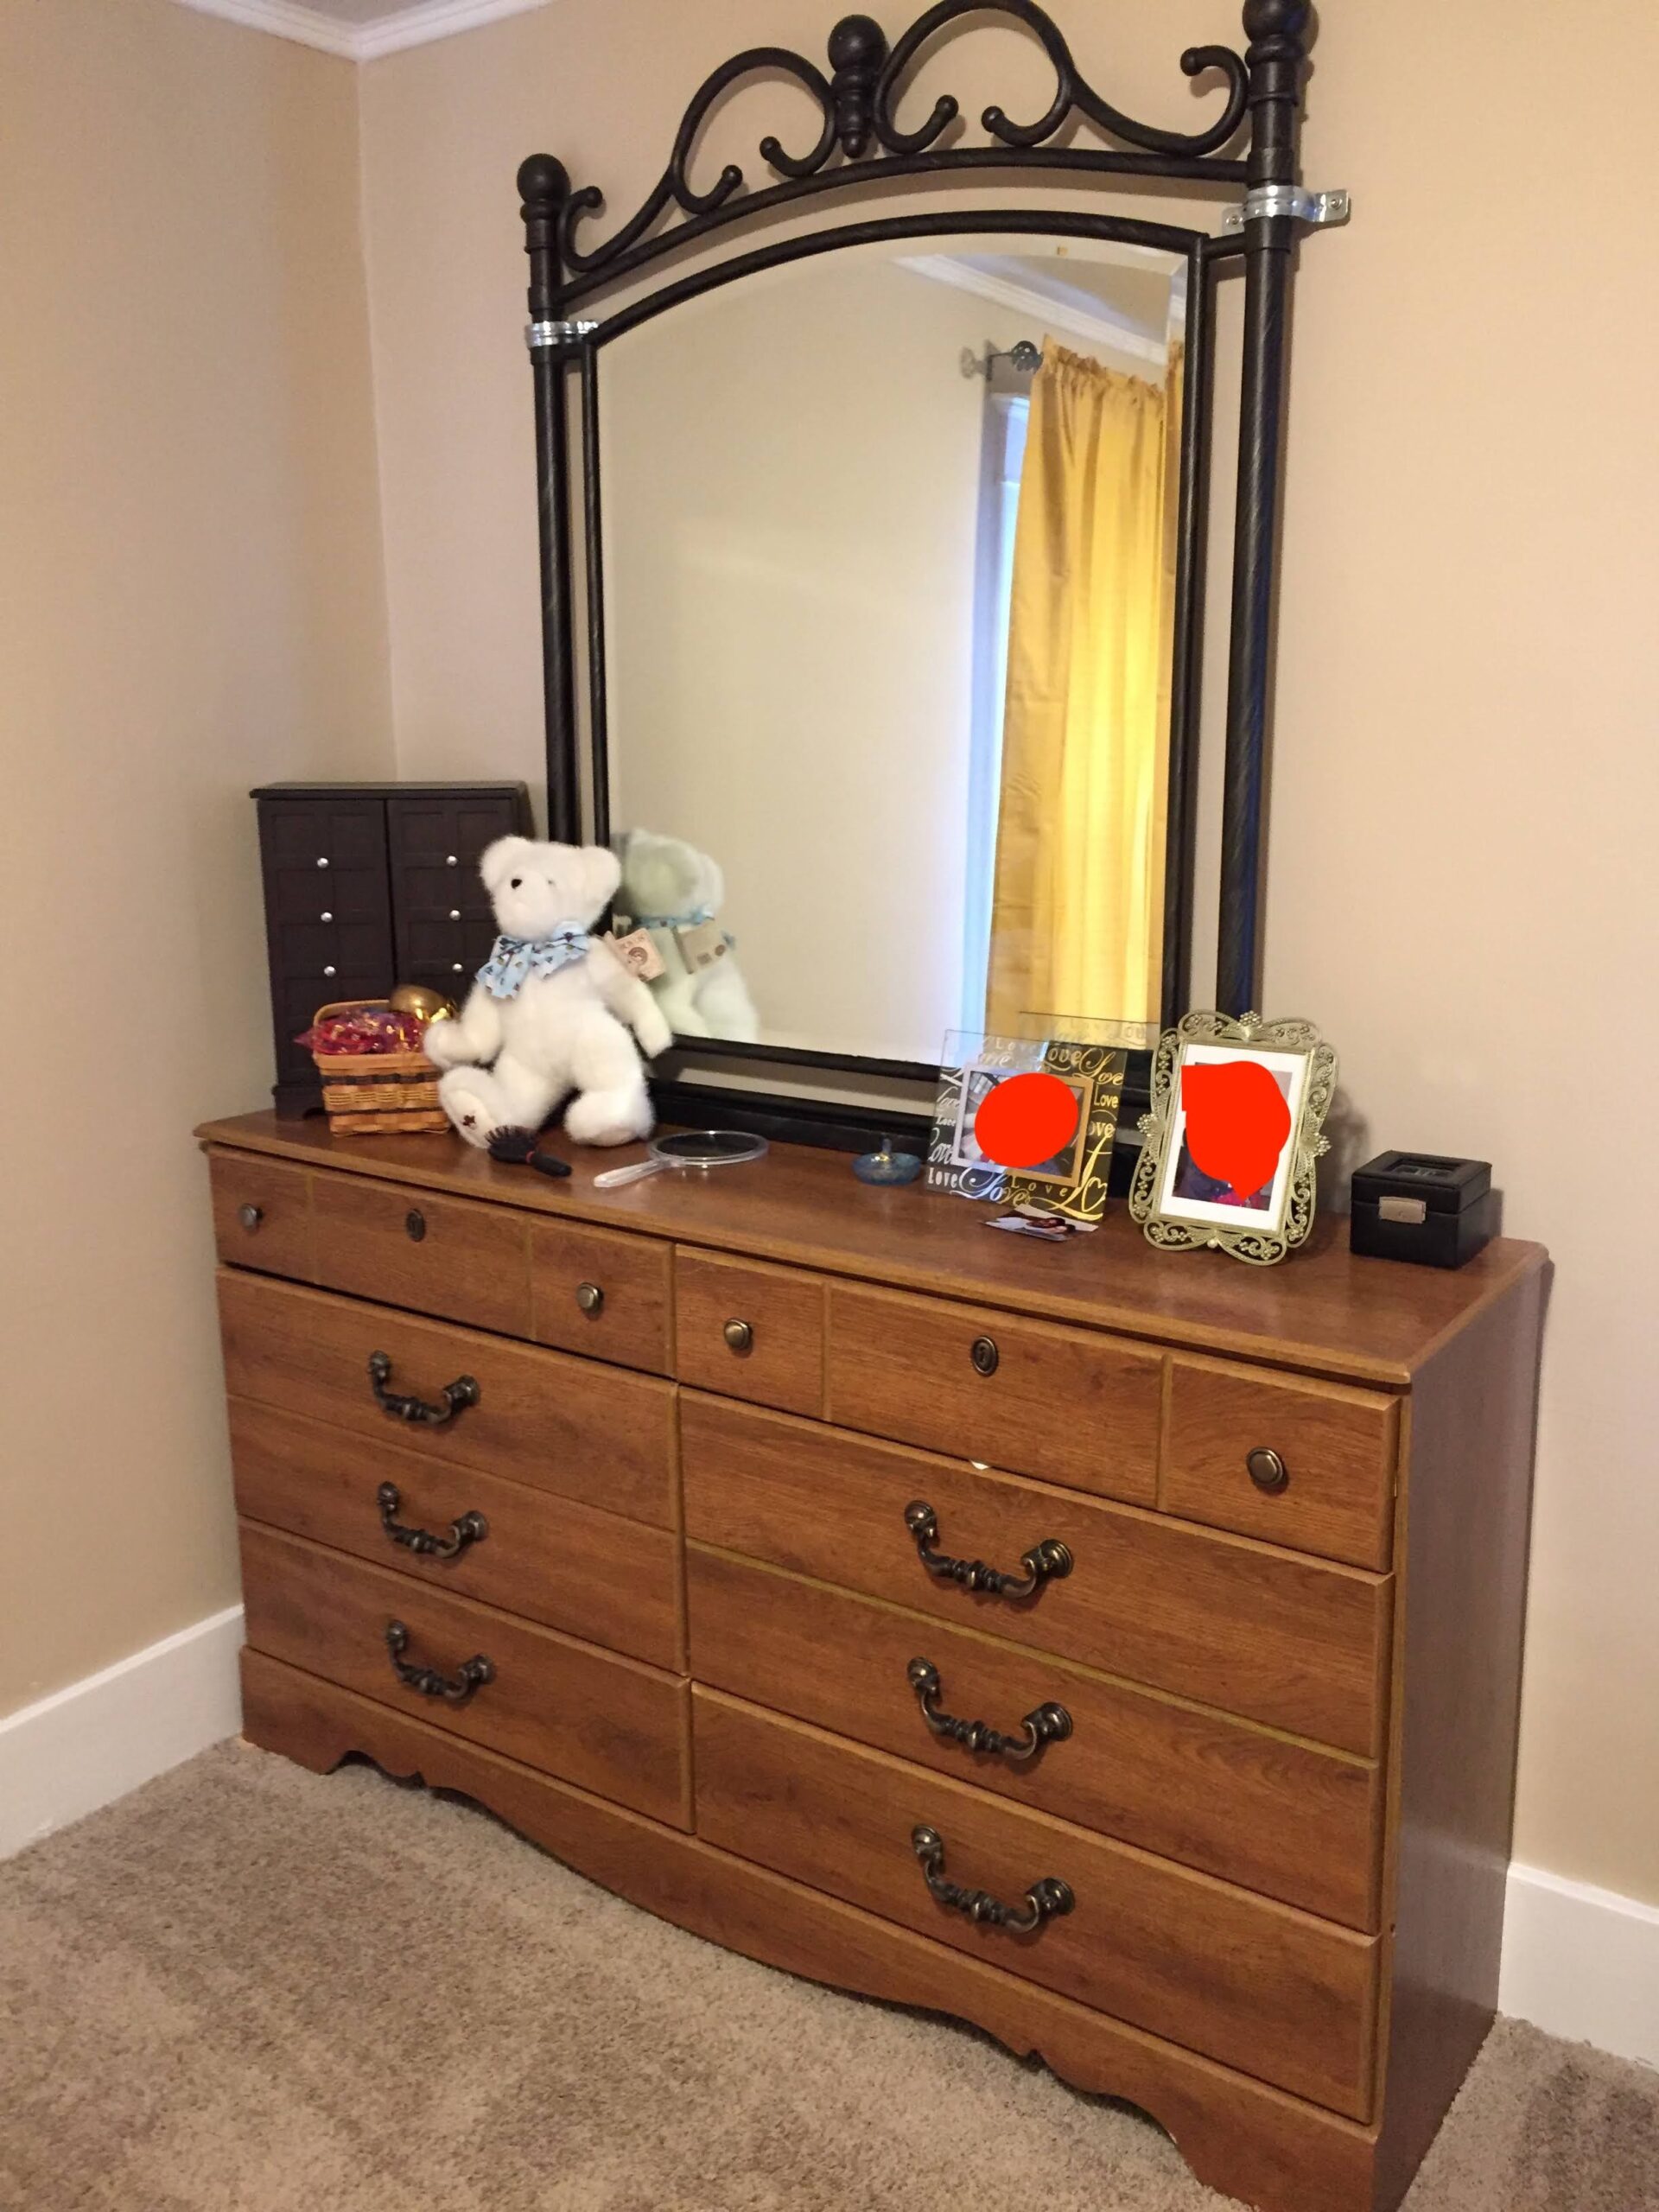
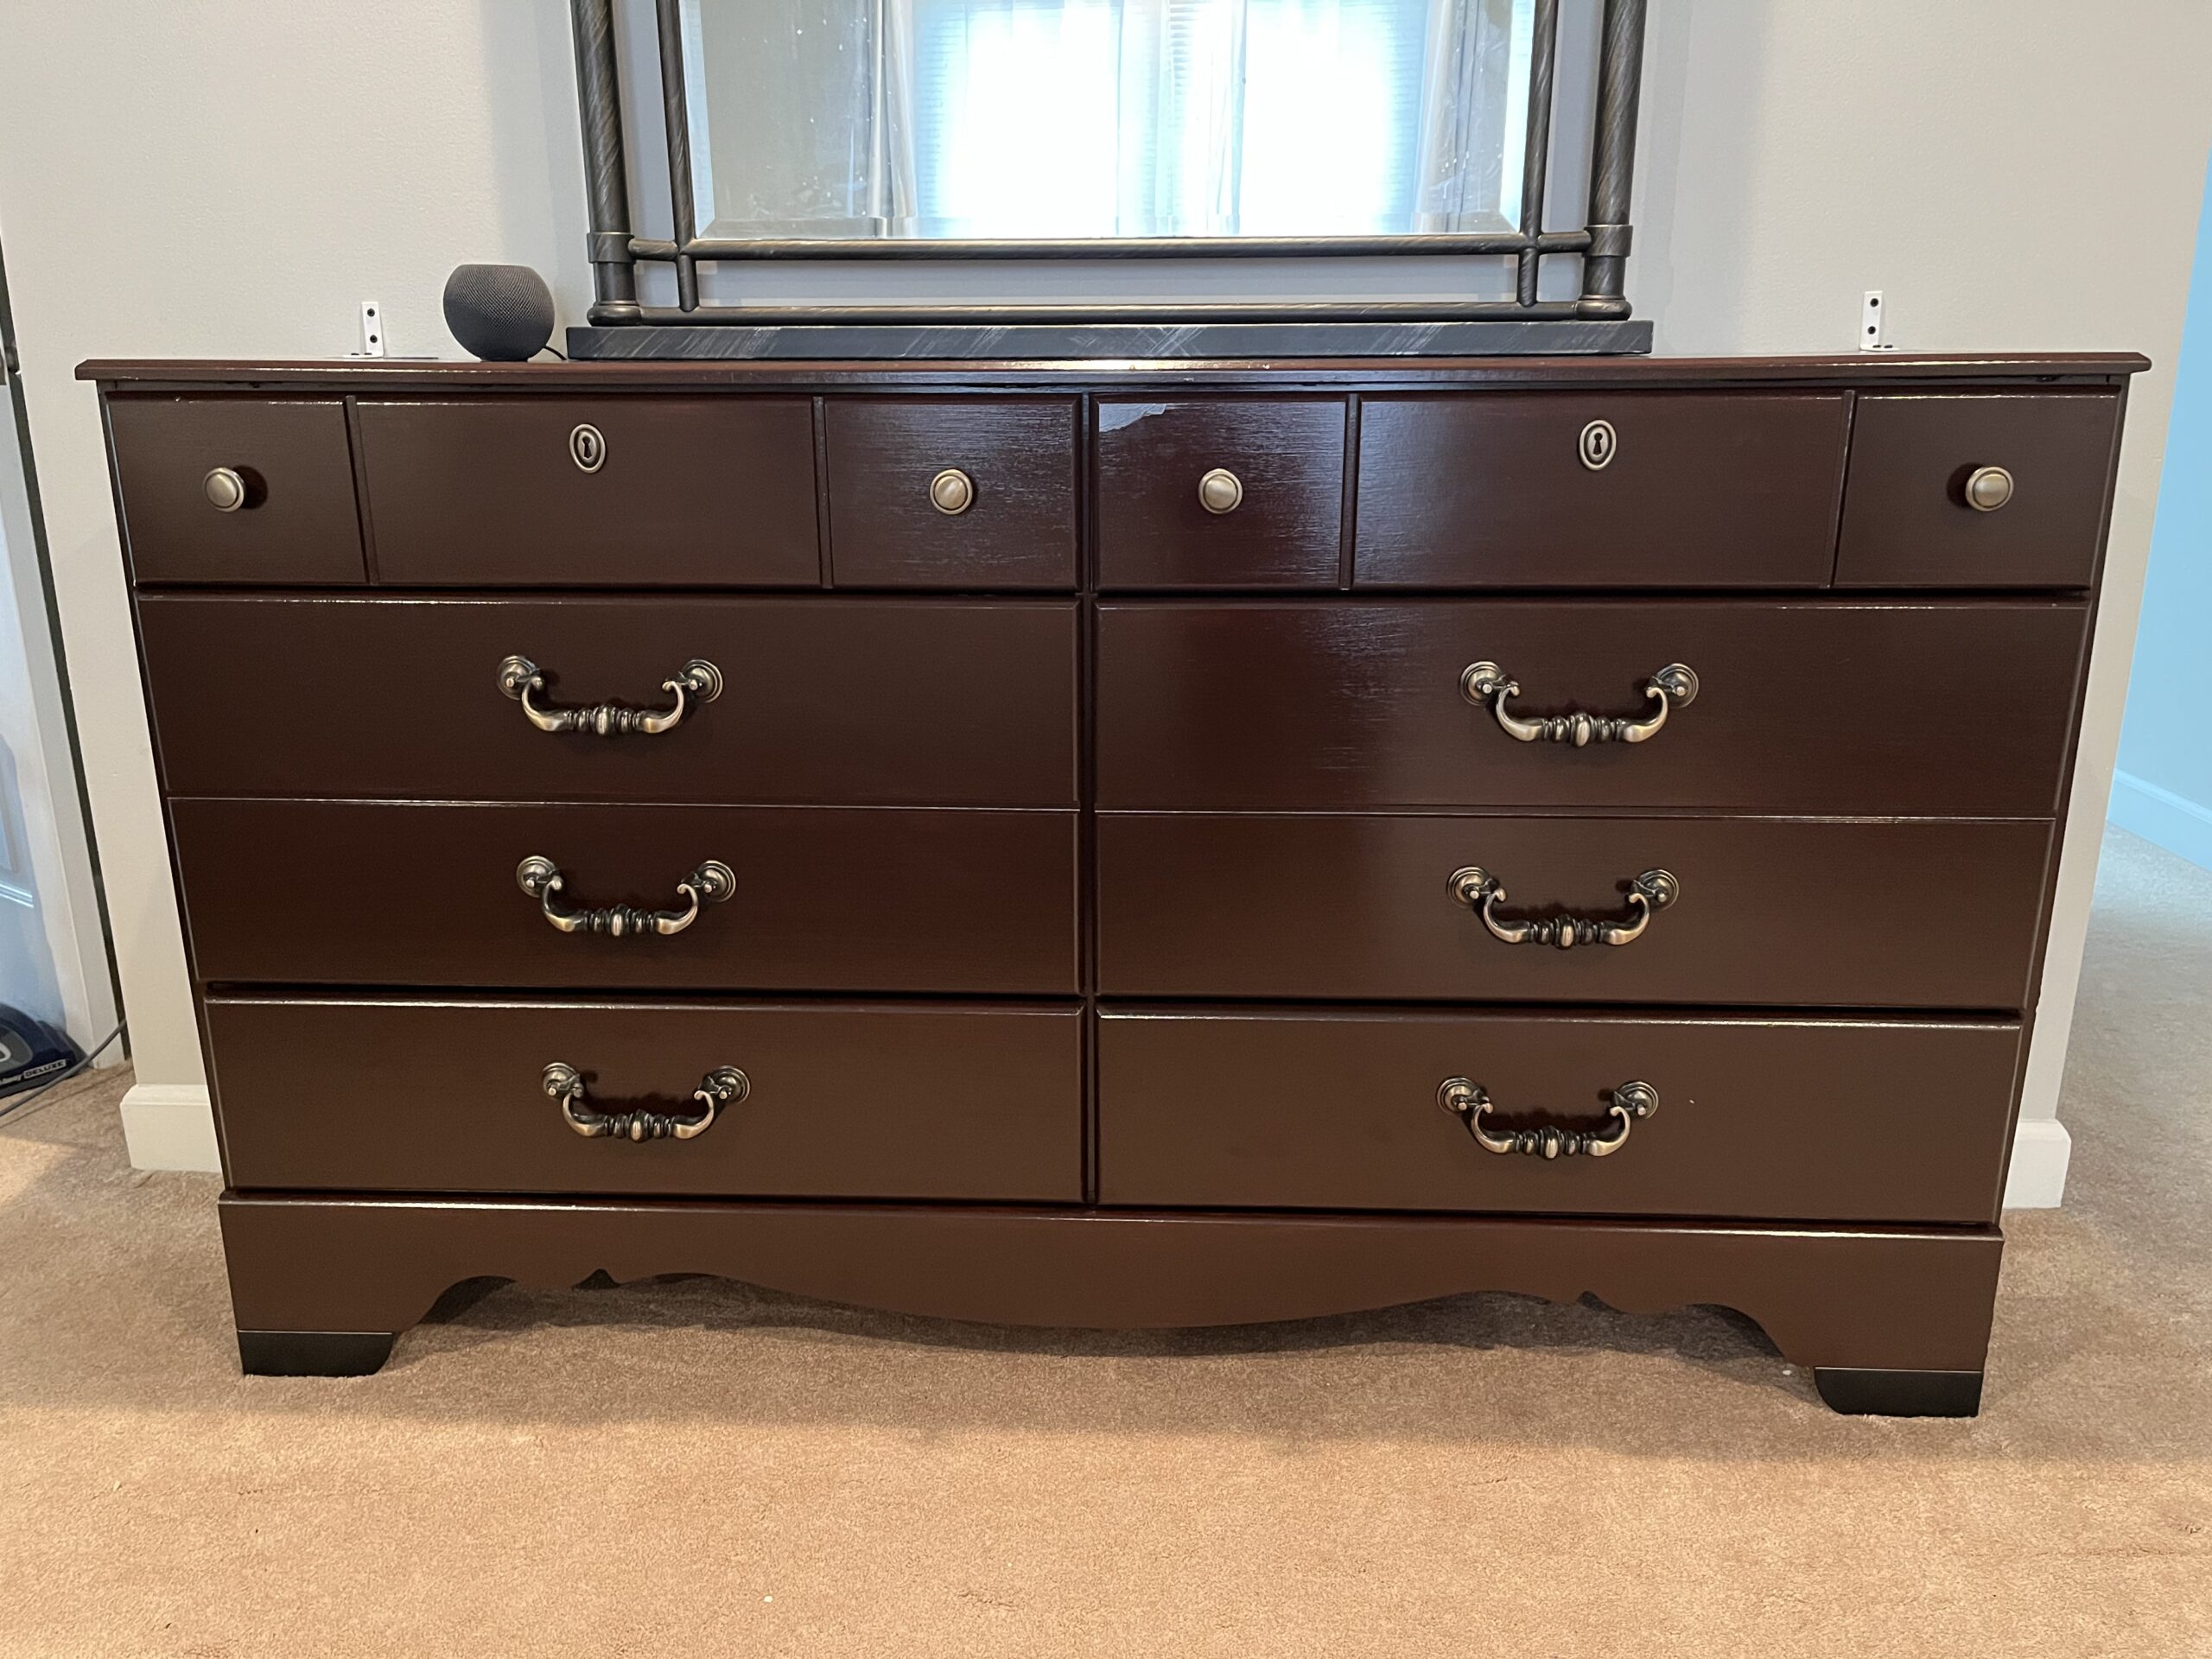
Our dresser as shown above in the photos went through a major makeover. This was always the plan, when we bought this used dresser off Craigslist. The original tan color was all worn out, and had marks all over. Worse thing is that the drawers were in horrible shape, with the old fashioned rails which were broken and would sag if drawn out. When Oliver started messing with these drawers, I knew it was time to change those rails, and also that the look needs changing. So after nearly 6 years of purchasing it, it finally went through that makeover.
First, I replaced the rails to modern soft-close ball bearing ones. The hardware I used is “Liberty Hardware Soft-Close Ball Bearing Drawer Slides” and cost me ~$76 for 6 pairs. I’ve used liberty ones before when I remodeled our kitchen in Fort Wayne. I knew these are high quality drawer rails. It took me about 3-4 hours to install these.
Once the rails were in, I moved on to the task of staining. When it comes to stains, I am a big of General Finishes brand. I had some leftover Brown Mahogany stain from the time I did my home office shelves, as well as the corresponding top coat. So I decided to use those.
The staining job, just like painting involves lot of time, but mostly it is drying and curing time. I did 3 coats of stain, over 3 days, and 2 coats of top coat, over 2 days. In total it took me about 5 days for the dresser to stained, top coated, and dried. Once the job was done, it looked incredible as you can see from the photos. Wife even said that it looks like a $1000 dresser. Also, while I was doing, I installed these raisers which provided 2 inch height to the dresser. These were about $28. I think these look great.


Overall, the makeover cost < $110, and some elbow grease, but it turned out to be amazing.